

Dentist surgeons do surgery. They rely on staff to upkeep the equipment, order supplies, and call a repair vendor when something is broken. But very little attention is ever placed on such a valuable and betraying subject such as how and when to maintain your surgical implant kits.
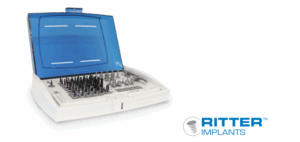
Most kits are similar from any company. But understanding the jaws and where the types of bone differ is where it all happens. Type I bone is the hardest and densest bone. Usually only found in the direct front of the lower jaw. Overheating this bone is very easy and in as little as 7 degrees of elevated temperature. The recommendations for not overheating the bone in Type I is to drill gently using high speed and plenty of irrigation. But rarely are specifics given, until now.
Type I bone: Replace your pilot bur every 2 cases. This is ABSOLUTE.
Replace your step burs every 5 cases.
Type II bone differs slightly in that it contains slightly more bone marrow spaces and is slightly less dense. However, it is still quite hard and overheating this bone can be as easy as Type I.
The recommendations for bur replacement and maintenance are similar to Type I.
Type II bone: Replace your pilot bur every 2-3 cases depending on how many sites. The more sites, the duller the pilot blades become. This is ABSOLUTE.
Replace your step burs every 5 cases.
*Type II bone many times has a thin layer of Type I bone at the ridge crest. Using a high-speed surgical bur to first penetrate that area is highly advisable.
Type III bone: Now begins to be somewhat more elastic and less dense. Usually for mid jaw and cuspid/bicuspid areas of both jaws. Also found in grafted sites, especially in posterior molar sites even after waiting 4-6 months for healing.
*Type III bone also may have a thin layer of Type I bone at the ridge crest. Using a high-speed surgical bur to first penetrate that area is highly advisable.
Replace your step burs every 5 cases.
In Type IV bone, you are basically forgiven and at the mercy of your steady hand. You may need just the first few drills and best case is using the Ritter hand driver for implant placement under very stable and controlled rotation.
If all you are placing in is Type 4 bone which is usually posterior maxilla, then replacing your burs could be up to every 10 cases but should not be any longer.
Cleaning and disinfecting of your dental surgical implant kits takes care and attention to detail more so than other kits in the office.
Meticulous attention to cleaning and scrubbing every bur including the ones that were not used is essential to having a sharp and effective kit that does not or minimally overloads the osteotomies.
The sterilization tech staff should carefully take very bur/drill out one by one and scrub them after they have gone through the ultrasonic cleaner. The best tool for this scrubbing is the Bur Cleaning brushes available through most dental suppliers.
Bur Cleaning Brush
Using this brush will permit the staff to rub off any remaining bone fragments that have been caught up in the flutes of the bur or into the serrated edges. Even after sterilizing, if some of these organic bone particles remain on the bur and that bur is used in an osteotomy preparation site, ultimately that site has been cross contaminated and failure is quite likely. A simple process that gets overlooked all the time.
The surgeon/Doctor must make sure that proper protocols are in place and enforced by performing routine checks and Quality Controls.
Addition training and refresher course yearly should be part of the course of doing business to assure the highest standards in sterilization and patient care.
For ordering supplies, burs and cleaning brushes, contact: Ritter Dental Implants
For more information or additional training, contact the author at: DrNilo@SiOSdental.com
Or call to: 1-239-293-3961